Composition and Styling: The Art of Interpreting Interior Design
How a collaborative partnership between photographer and designer creates magazine-worthy visuals
Unlike property photography, interior design photography is not about just shooting wide and getting it all in; it’s about understanding the intent behind your scheme and using the photographer’s eye to curate a narrative that does the design justice.
“The Photographer's Eye” Interpreting your designs
Defining the photographer's eye is difficult, yet it is often the difference between an average shot and an exceptional shot. I feel my eye is guided by an inbuilt radar for aesthetics, a love of what I do, and most importantly, years of experience picking angles and compositions to build the best images. Sometimes just moving slightly to the left to reveal and ground a chair leg is the difference between a good and great image.
"Camera height and anchoring furniture within a composition" Visit case study
Design interpretation
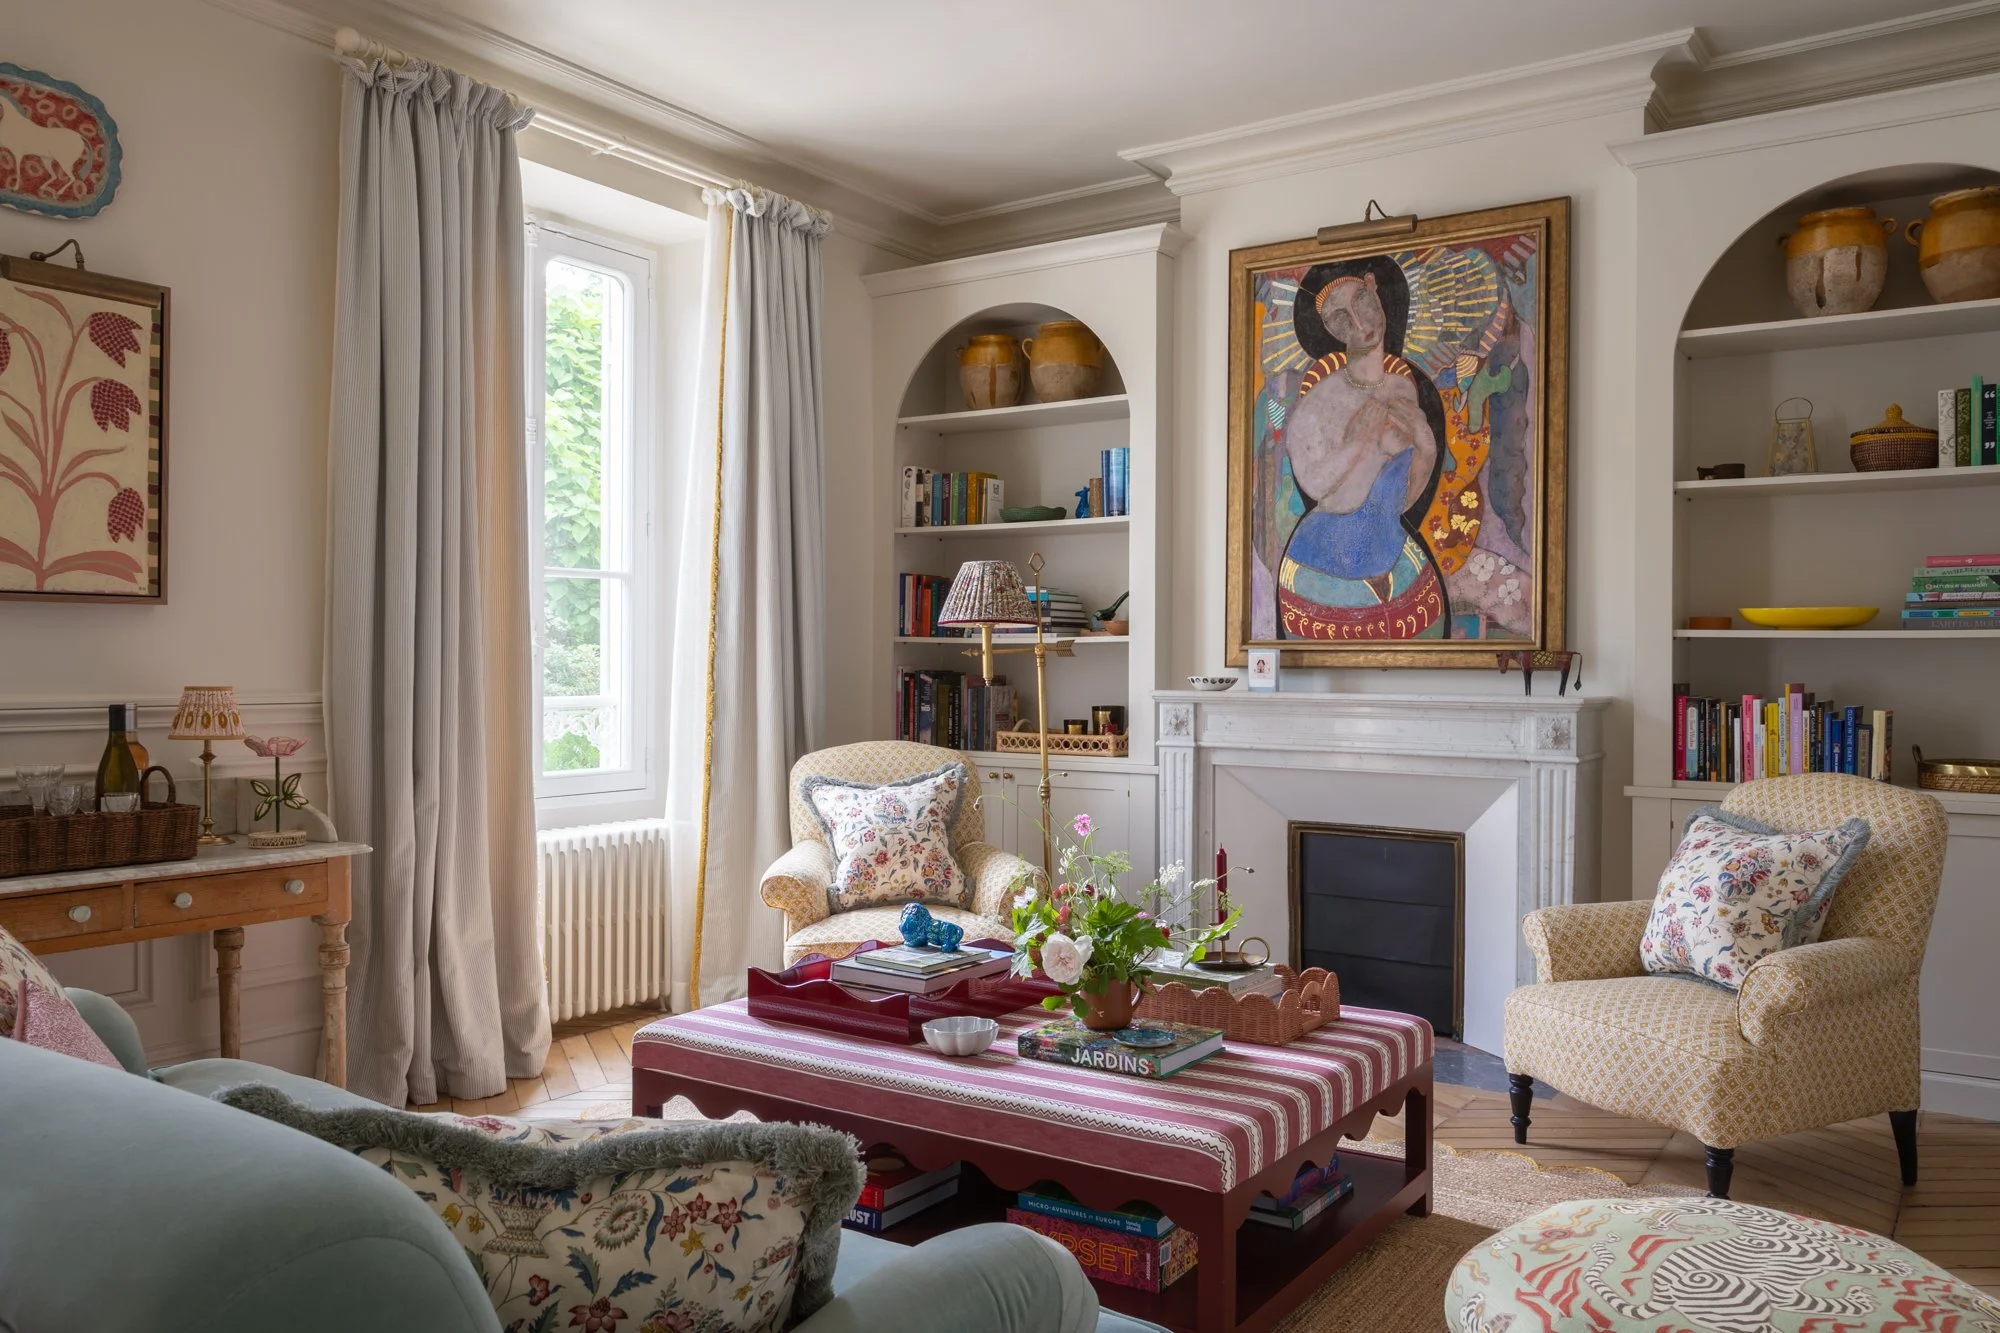
Camera height: Although hip height is a good starting point, lowering the camera when shooting a sitting room will be a more immersive perspective for the viewer.
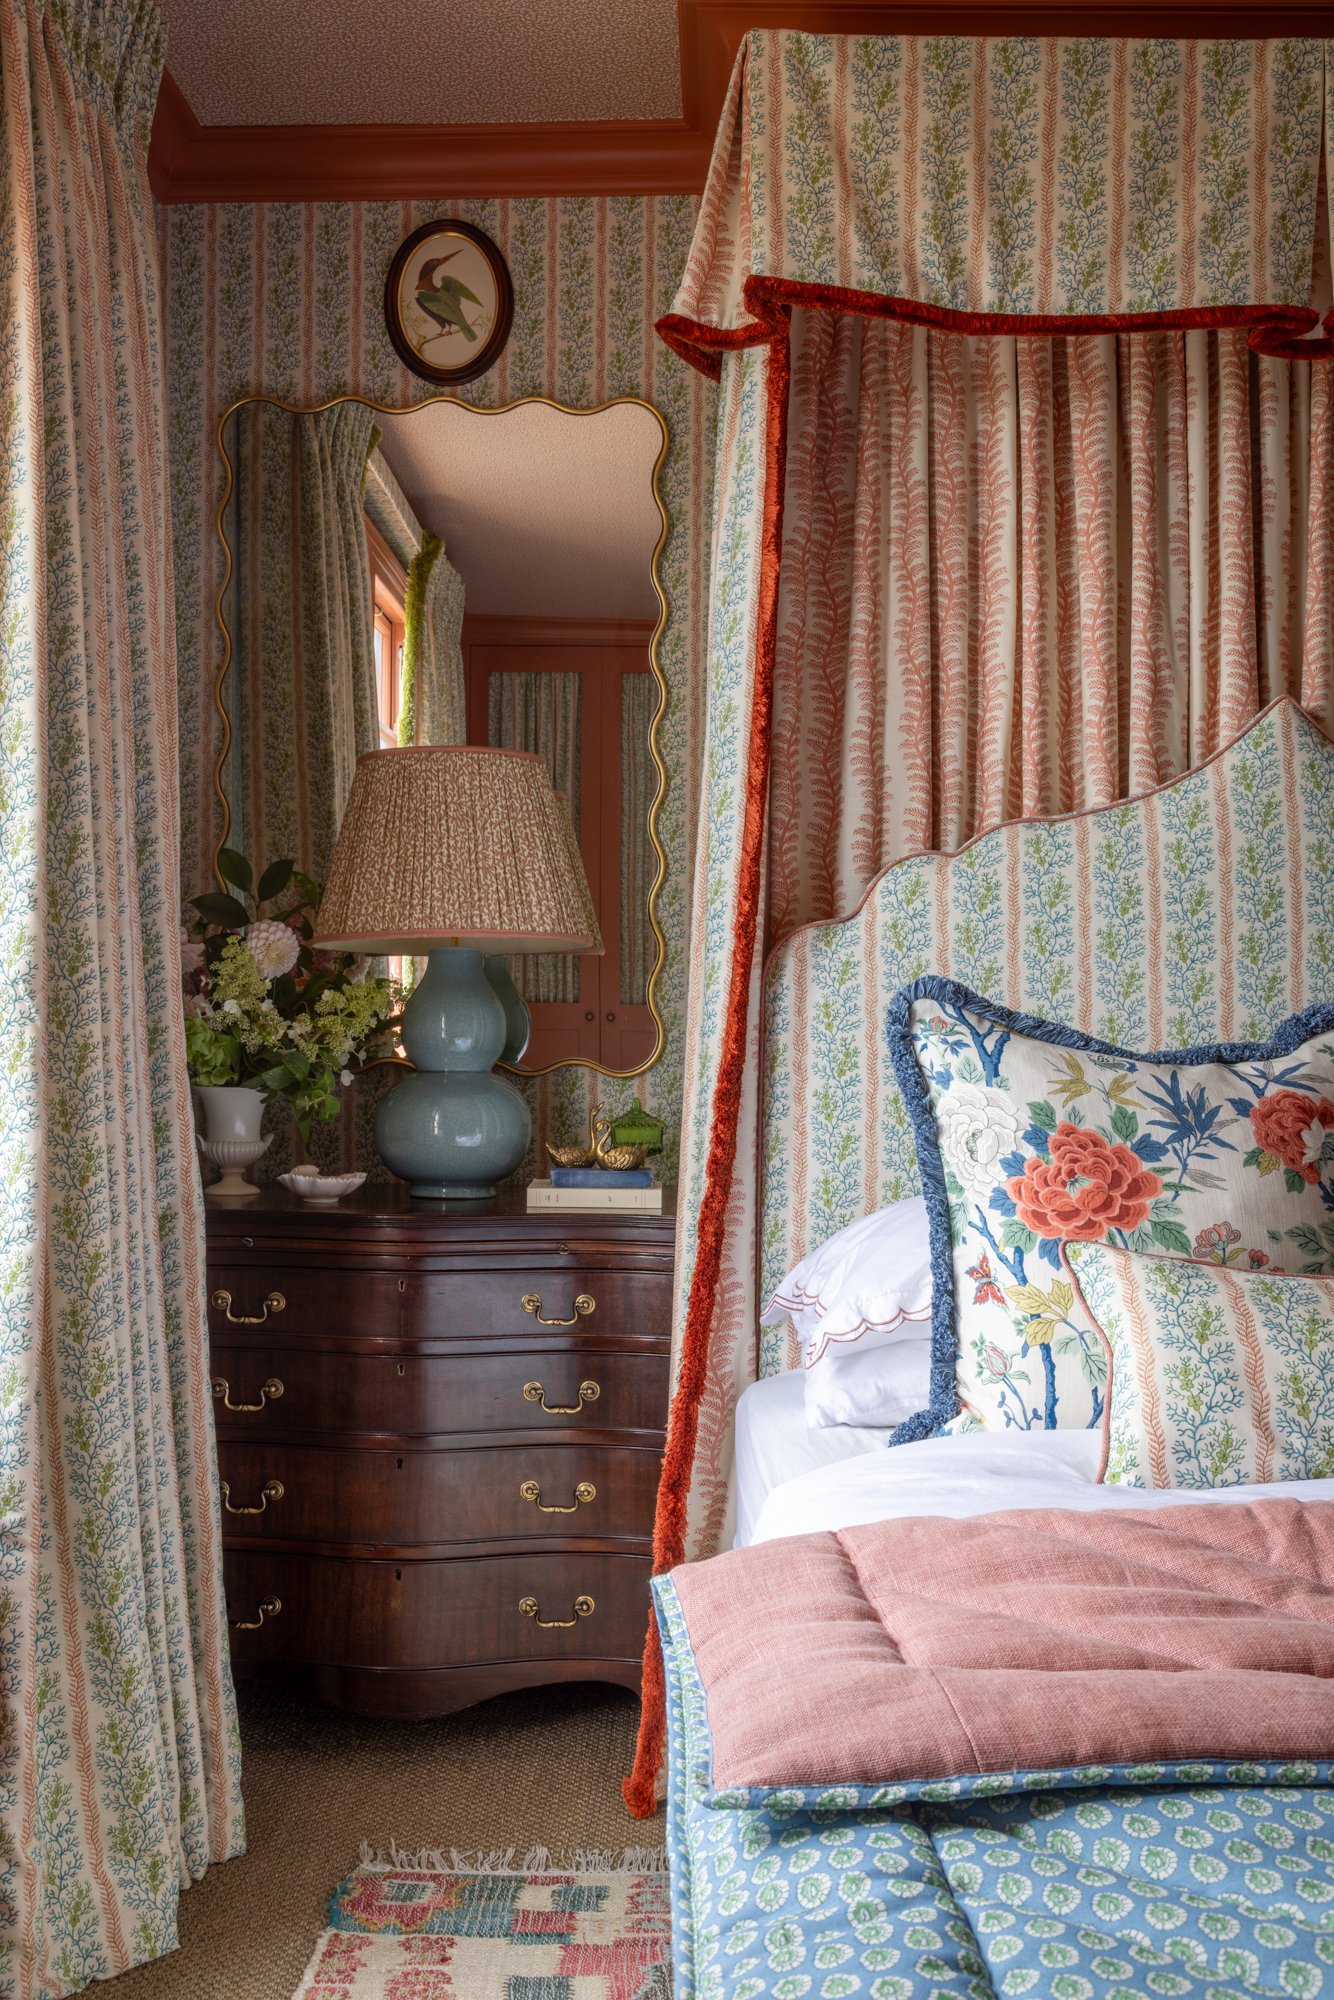
Grounding furniture: Being able to see at-least one leg of a chair or table grounds the object in the shot revealing the silhouette and helping with depth perception.
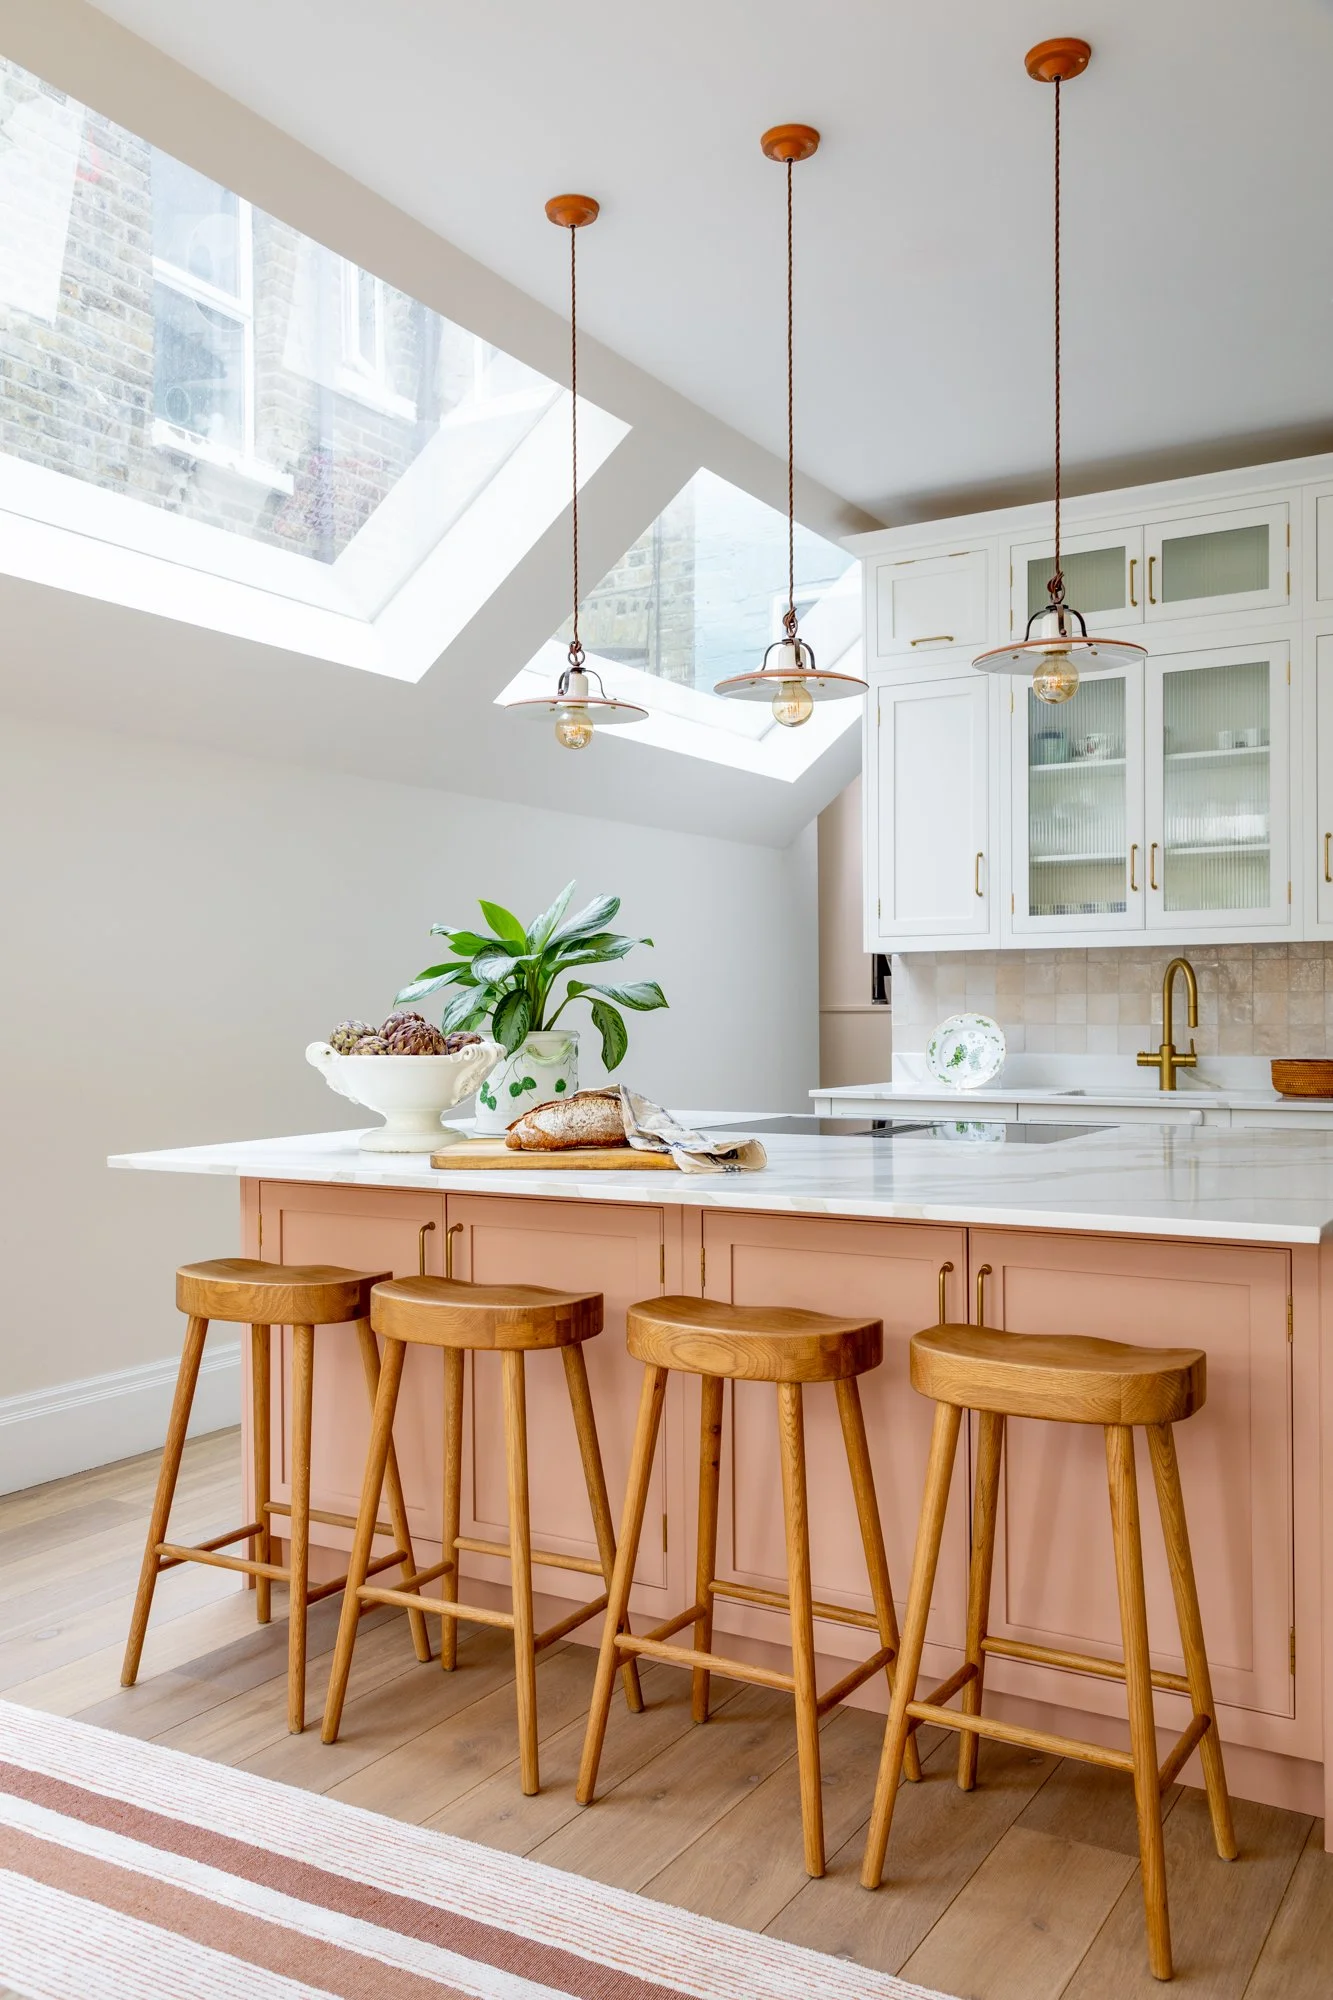
Square on: Some rooms lend themselves to a one-point perspective straight on angle. Centralising fireplaces or tables is then important, but so is breaking the symmetry so the shot looks authentic and not staged.
Leading the eye: Using sightlines, furniture placement and negative space, will draw the eye through an image to the main feature, focusing on your bespoke joinery or a key fabric.
Visual weight: Size, colours and textures should all be used to balance an image, offsetting larger items of furniture on one side with a strong painting on the other for instance.
“Strategic Composition” Knowing the angles
There are some perspectives which will never go out of fashion, for instance a portrait square-on bedroom shot down one side of a bed can illustrate the whole of a room, but in a pleasing cropped-in frame. There are then other trends that come and go like shooting all of your images perfectly square-on which was adopted by The Modern House.
Whilst that worked well for their brand, for interior designers I think a mixture of square-on and 45-degree shots will always be the staple. Most of my work falls in that bracket unless I’m shooting tighter vignettes where the verticals are not as important and the main focus of the image fills the frame. Ultimately, the choices I make on a shoot are all driven by the interior designer’s work, and making sure the set of images are cohesive, with well composed wider shots being complemented by more detailed vignettes.
"Highlighting the patterns and quality of materials for GP&J Baker" Visit case study
Visual hierarchy
Industry trends: Whilst keeping an eye on trending “looks” and angle that are currently popular, this should not be detrimental to your schemes design integrity which will determine the compositions for your shoot.
Wide angles and vignettes: Both are important and complement each other. Wide shots explain how the scheme works as a whole and the closer detail shots show its soul through textures, patterns and craftsmanship.
Layering images: The foreground is often forgotten in wider shot, but a well placed element such as a pot or plant helps to create a more 3D image and shows another piece of your scheme.
Close-up vignettes: Selective narrow focus can be used to good effect on detail shots. For instance, you can use this technique to draw the eye to a particular fabric on a cushion within a wider scheme.
Looks right in camera: Sometimes moving a piece of furniture can improve the balance of a shot “in camera” even if it looks odd in real life. This is where experience is invaluable.
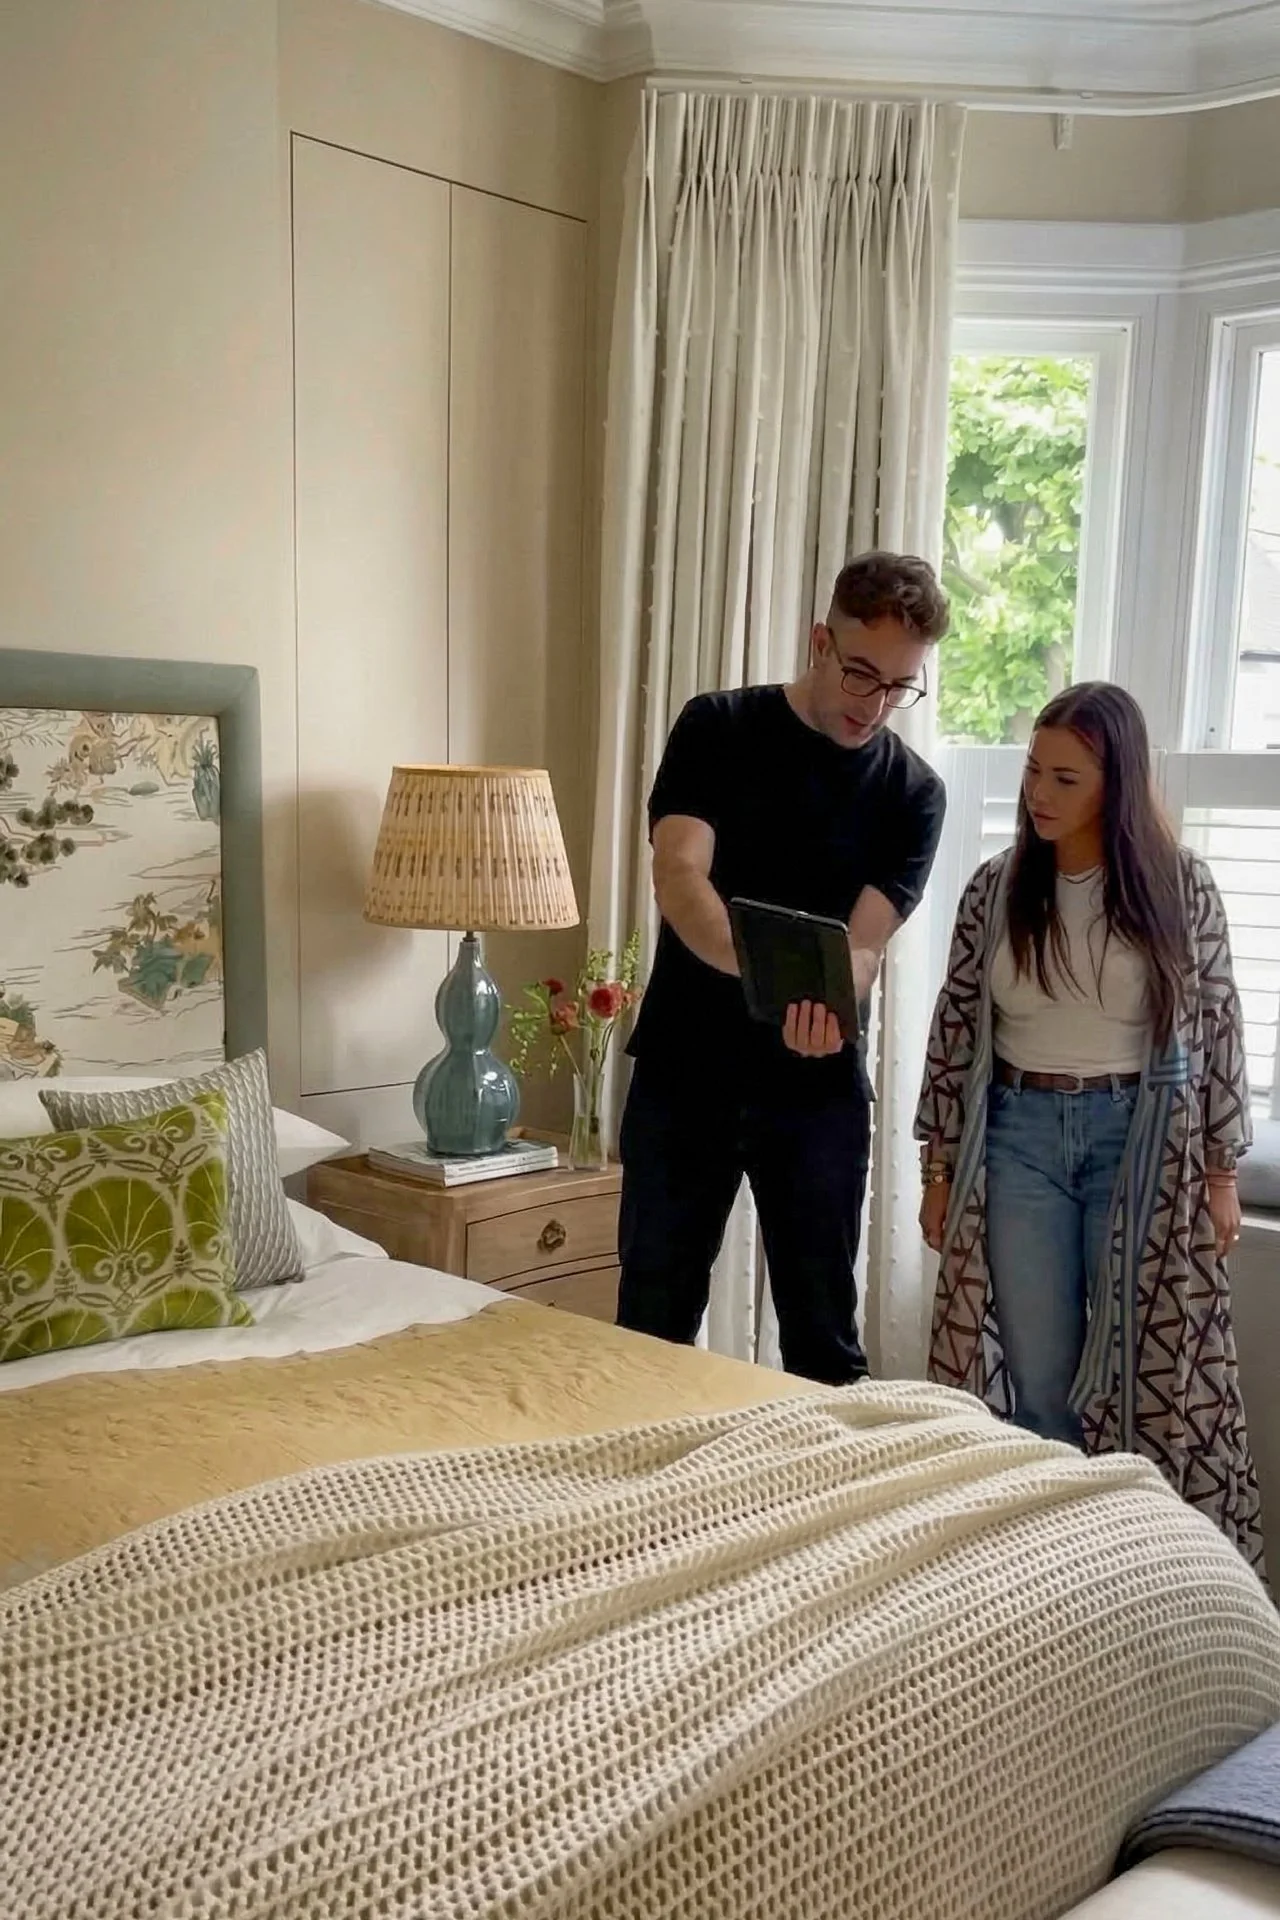
“Styling for the Lens” Reviewing and adjusting
Once a composition is locked in, I take the time to position items so they have space to breathe and place props so they complement rather than dominate a scene; all skills I have learnt whilst working with stylists and interior designers.
I review the composition and styling on the iPad with my clients before committing to each shot. These micro adjustments ensure the soul of the design survives the transition from a 3D room to a 2D image.

"Styling for the lens, micro adjustments for Village London" Visit case study
Refining the shot
Colour grading: Having constant warmth and saturation throughout a set is paramount. For example, I keep an eye on direct sunlight from a window as it can make crisp whites appear blue.
Editorial breathing space: Ensuring every item is there for a reason and not just cluttering a scene. We can also use props and styling to offset larger items to help with compositional balance.
Matching and complementing: Choosing books, flowers and artwork with colours that complement a designer's scheme will lift the images and draw focus to the visual threads of the scheme.
Soft furnishing: Everyone has a different idea on how cushions should be chopped or how casually strewn a throw should be. Reviewing on screen rather than in real life is important and ensures consistency throughout the shoot.
It's all in the details: Making the small adjustments like freeing a chair leg from a table leg, rotating the vase of flowers, choosing the right sized coffee table book, that makes a big difference to your final images.
“Visual Assets”, pitching and brand
Ultimately, these images are more than just a record of your project; they are visual proof of your style and craft. So whether it’s showing a prospective client how your schemes and renders become reality or pitching a feature idea to an editor, a comprehensive set of images that accurately show the depth of your hard work is invaluable.
While the project itself is eventually handed over to the homeowner, these images remain as the permanent visual legacy of your design and an ongoing asset that promotes your brand.
Let's discuss how we can document your next project for editorial success
Knowledge Base
Planning for a seamless photoshoot
Planning ahead, adapting on the day, and refining in post-production.
Photography for Interior Magazines
Creating images that start the conversation with writers and editors

Chris Wakefield Photography
More about me, my clients, services, portfolio and how I work.